Forward

I have moved! Please check out my newest creativity at www.southshorehandmade.blogspot.com.

Friday, May 27, 2011

Jammies

Early on Saturday, I'm dragging the boys in the car and starting the drive to PA to visit family. Between now and then, I have to finish packing, take the cats to the kennel, wrap presents and have a little party for my giant 2-year-old, clean up the house, consolidate houseplants for watering, etc, etc, etc...

So today, I made little boy jammies! A totally appropriate use of my time.


All of the fabrics are from good old JoAnn Fabrics, and each set took about an hour including cutting. The boys picked out their own prints and are super excited to have these. I didn't use a pattern but traced jammies they already have, adding a bit for growing room. My big boy's fit better because he was more cooperative with the trying on process than my crazy baby, who is very much the 2-year-old these days.


I asked for a model pose and got this. Such a ham!

Tuesday, May 24, 2011

Butterick 5486

Here's the great reveal of the Blah Dress briefly mentioned here.


I don't think my displeasure is due to the pattern, Butterick 5486, but more about the size I chose and the style on my body. This pattern called for for a knit with moderate stretch. I used a stretchy bamboo jersey. That, coupled with the fact that my last knit dress was a tad roomy in the size 10 made me cut the size 8. It's just too small all around. Straining around the armholes, too high-waisted, and too short for this style (I didn't have enough fabric for the full skirt length anyway). I also don't like the shape of the straps on my shoulder. This mid-width makes my shoulders look mammoth. I think I need thin straps, or a wide one to my shoulder.

I tried to justify keeping this dress. Though it won't work for the Baby Shower I'd envisioned it for, it would make a nice beach dress. I like the wrap style, and in theory, I like the full skirt. I don't think it looks as bad in the photo as I feel it is in person. But in the end, I just don't love this dress at all. It would probably sit in the back of my closet for a year or two until I could bring myself to get rid of it.

So this morning, I hacked off the skirt, which has a lot of gathered fabric in it, and I'm going to try to salvage it into this top.

To give you an idea how the tie flap thingies come out of the side seams:


I've been quite productive these past few days. I made some tiny baby jammies for the aforementioned baby shower. I just need to buy some more snaps to finish that project and post a pic. I've also almost completed a black dress for a funeral. :-( Hubs' sweet grandmother passed away a few days ago, so I'll be taking the boys up to Ohio for the memorial service in about a week. When I sing at funerals at my church, I usually wear a black skirt and dark gray sweater (long or short-sleeved), but I thought a black doubleknit dress would be nice to have in the closet and will be easy to pack. I already have this one, but it's a bit too va-va-foom for a funeral.

Sunday, May 22, 2011

PR Knock-Off Contest - Kate Spade blouse

Well, I said I was going to post about a letdown dress, but I can't help myself. I made a blouse in less than 24 hours and can't wait to share. The loser dress will have to wait.

The Pattern Review Knock-off contest got my wheels spinning and I decided to attempt this gorgeous Kate Spade blouse I stumbled upon last week. I had some polka dot silk habotai from several years ago at Gorgeous Fabrics, and even though the colors are reversed and it's a smaller scale, I'm all about stash-busting this year.


My neck ruffle is slightly smaller in scale (mostly because I used up every last scrap of fabric), but pretty much everything else is the same. I don't believe the original has any darts at all but mine has triangular bust darts for a little shape. I used New Look 6849 and just didn't make the back vertical darts. I can slip it over my head easily without a zipper (and without those back darts).


Neckline close-ups:


How I made this top:

Start with the basic shell (I used French seams for all of the seams), and cut a slit center front almost to the level of the bottom of the armholes.


To finish the slit, I used a strip of fabric that bordered on the selvage to avoid turning under a fiddly little allowance on the inside. Stitch the strip, cut edge even with the slit edge, with a 1/4" seam.


I've recently come to appreciate hand basting. While I used to abhor hand-stitching of any kind, I completely see the appeal now. The control you get is unmatched with pins, and if you count extra time you'd spend fixing mistakes, it takes no longer than pinning. Anyway, I pressed and folded the selvage edge behind and basted everything in place.


Edge-stitch on the right side, very close to the fold, catching the selvage on the inside. Remove basting stitches.


For the thin band around the outside of the neck, I used a strip of Steam-A-Seam for sturdiness and to ensure a perfectly uniform strip. The length of the SAS matches the measurement for the neck edge of my blouse. Again, I used the selvage. I ironed my strip of SAS close to the selvage, then cut out my rectangle around it.


Here's the beauty of the Steam-A-Seam: Just fold over the allowances on the long edges, putting the selvage side on top, and iron down. It gets top-stitched on to the neck in a bit.


Two parts I didn't photograph were making the ruffle for the neck and the ties. The ties are just narrow tubes turned right-side-out and attached on the inside of the neck edges at the very end. The ruffle is just a rectangle of fabric. Original dimensions of the rectangle are twice as high as the finished ruffle height by 1.5 times as long as the neck edge (plus seam allowances on all edges). Fold in half lengthwise and stitch around to make a tube, leaving one short end open. Turn and finish raw edge by turning them to the inside a bit. I didn't even stitch this closed since it's held in place by the gathering stitches in the middle, but you could hand-sew the end shut. Gather through the middle with a running or machine stitch and adjust to fit the neck edge. Baste onto the neckline.

Pin (or hand-baste) the center strip on top of the ruffle's gathering and basting stitches, turning raw edges under. Edge-stitch all the way around. Stitch ties on underside of neck edges.


To finish, hem armholes and bottom with a narrow hem. Side note: this is the best my narrow hems have ever turned out. No waves or puckers. Practice does indeed make perfect.


≈I'm SOOOOO pleased with how this came out and entered my pattern review in the contest. :-) I plan to wear it with white linen pants to a baby shower next weekend.

Friday, May 20, 2011

A little Friday inspiration

First, thank you so much for the kind comments on my last dress. Like pretty much every other blogger out there, I love the feedback. Thanks for taking the time to comment.

On another note, I bought a top this week.


When I saw it and said "ooh ahh" and tried it on, I thought "wow. I've never been big into the shoulder treatment trend, but this is so soft and unique... it fits so well... love the color..." That familiar home sewist's thought of "I could make something similar" briefly ran through my head, but the price was very reasonable, and I like to support a smaller label as much as the next guy, so it came home with me.

Plus, although the shape is simple, the embellishment is unique. I couldn't do this would serious pattern alteration and muslins. Aint happening.


Maybe I can use this as some inspiration to "fix" the lackluster red dress I have almost finished... more on that tomorrow, most likely.

Tuesday, May 17, 2011

McCalls 6032

Here is my McCalls 6032 dress that I introduced here.

It was very straightforward to put together. In this view, the twisted belt piece covers the detail that I showed in my last post. I omitted the zipper and added an identical belt on the back of my dress. This pattern can be used with either knits or wovens. If you used a woven and needed the zipper, you couldn't add the belt like I did. This dress turned out a smidge big, probably because of the woven/knits combo pattern, and I used jersey. I made a 10 with no alterations. If I were to make it again (and I think I will make one shortened to a top), I would make an 8.

The fabric is a rayon jersey from Ressy's Fabric Co-op. It's easy to join the co-op, but Ressy is on a hiatus right now and there's no fabric available.

I wore this dress to church this past Sunday with a cami underneath and a cardi overtop. The front and back are low, but just high enough to not show my bra. I could wear it without a cami somewhere other than church. :-)

Close-up of the front bodice and belt. I finished the armholes with narrow, soft elastic for stability with stretch.

View of the inside. There is a facing for the whole bodice that has an elastic casing at the bottom. I have to adjust it when I first put on the dress, but after that, it stays put.

I didn't match up the floral when I cut. They are so big that I thought they'd benefit from being broken up a bit.

I did a pattern review here.

Monday, May 16, 2011

Beadboard Backsplash Tutorial - Part 1

I've not been sewing much this past week because I've started a new project (or 3). This definitely falls in the Home Improvement category and not in the Sewing or Knitting ones, so feel free to click away. My feelings won't be hurt. :-) However, maybe this will help someone out, so here goes...

We moved last summer to Florida, into a brand new, perfect home (yea!). It has no "backsplash" in the kitchen except for the 3" Corian counter lip thing. After painting the kitchen walls BRIGHT green, the kitchen was feeling a bit dark, and I wanted some sort of backsplash. I got the inspiration from The Lettered Cottage, and decided white beadboard was the way to go. Hubs left 2 weeks ago (he'll be gone for work for 4 months), so I figured there's no time like the present! Here is my beadboard backsplash journey....

I used pre-primed panels that lock together. They were a very manageable size to install myself. It would have been cheaper to get a huge sheet of un-primed beadboard, but I could have never gotten it cut accurately and nailed up by myself.

First, measure the height of the backsplash area you want to cover and cut some pieces that length. I used my miter saw and needed to flip the pieces over to cut the whole way through.


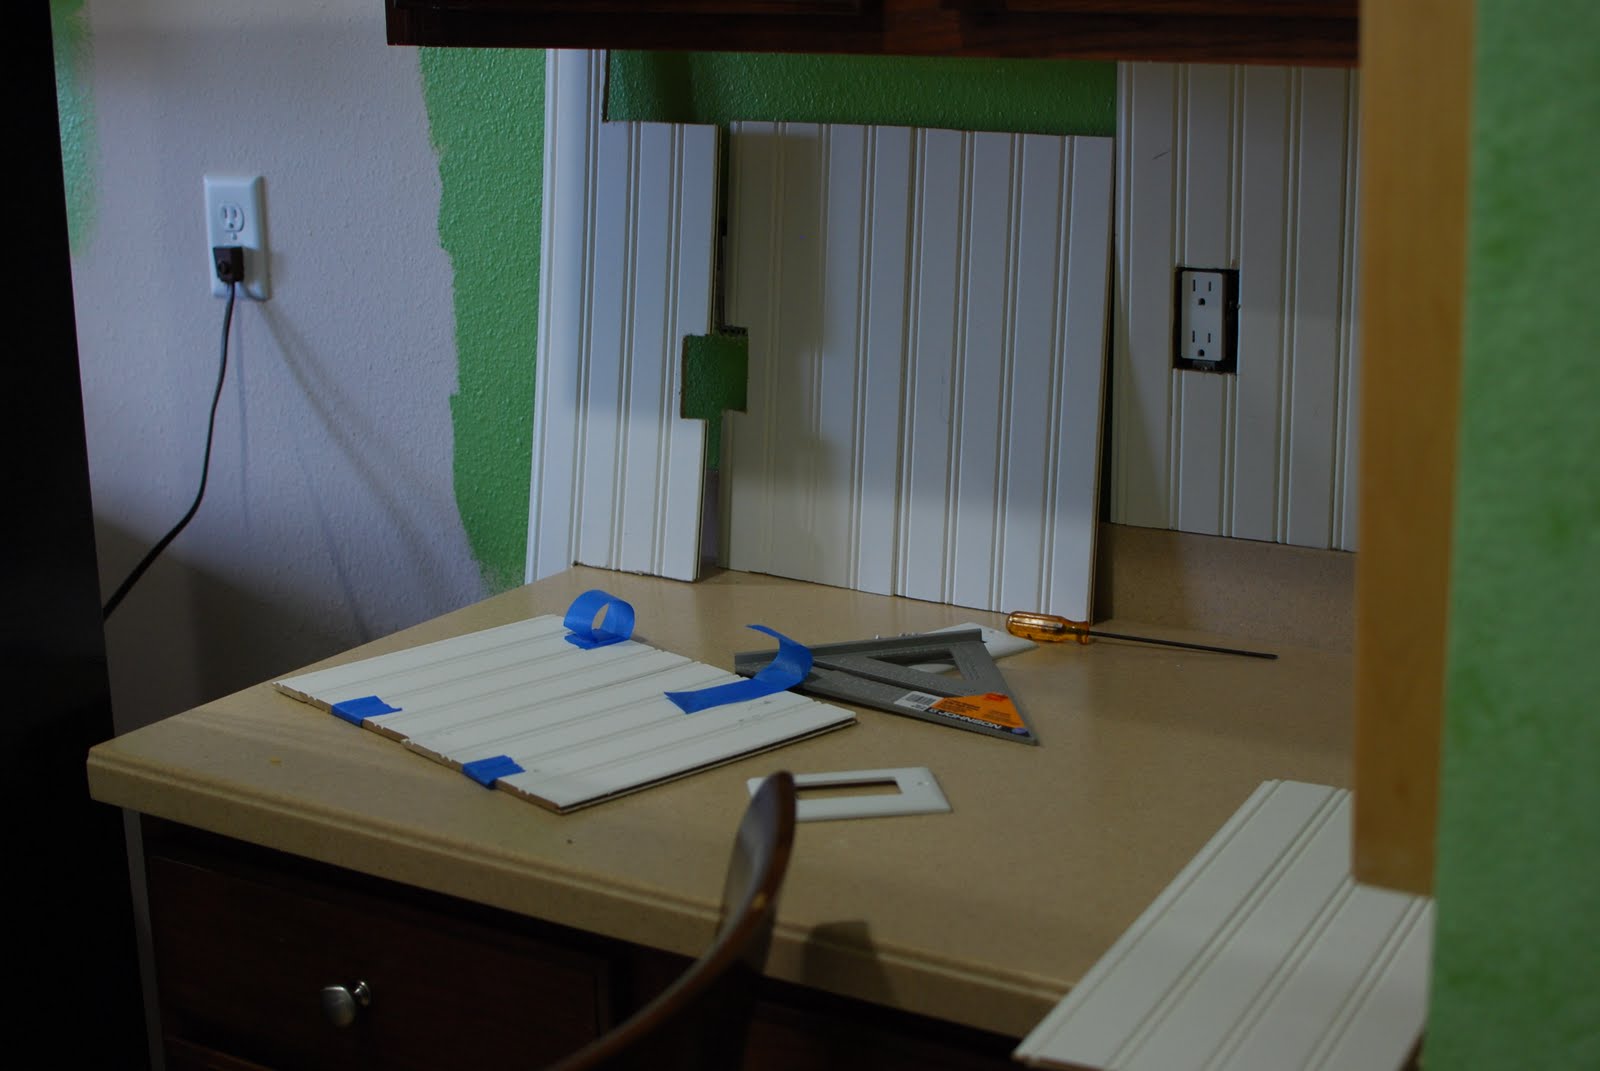
It probably won't take long for you to come to an outlet. Remove the plastic cover and start marking. If your outlet will fall between two sections of board (easier to deal with), hold up a board and mark the tip and bottom of the outlet. It's always better to err on the side of too small an opening. You can always make it a bit bigger, but if you make the hole bigger than your outlet cover, you've wasted a board.

To mark the vertical edge of the outlet, you can measure or use my very unscientific method of laying down the board where it will ajoin the next one and using a straight edge to find the mark for cutting.

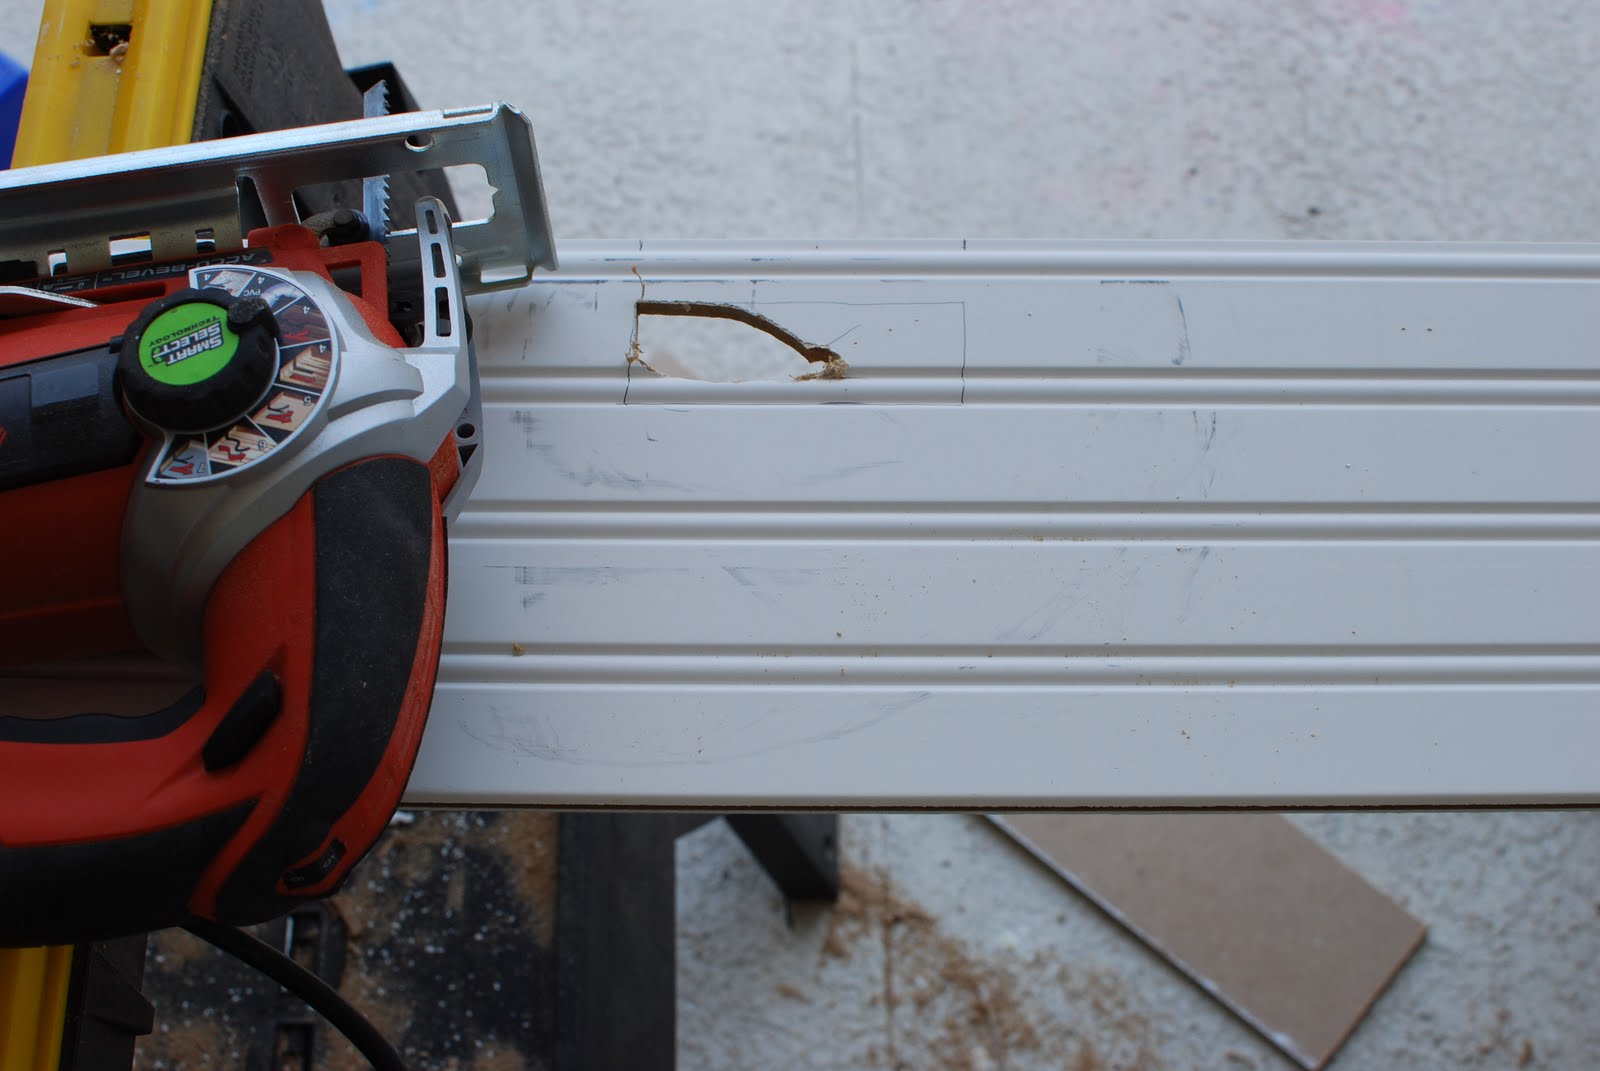
Here is the rectangle I need to cut out:

Using a jigsaw, cut the two lines intersecting with the edge.

Then, you'll have to take out the rectangle in two chunks as shown.

Wash off the saw dirties with a damp sponge.

Cut the other side of the outlet the same way. Maybe you'll get lucky and have it also be the edge of the counter bordering the refrigerator...


After cutting this outlet, I realized I need to cut them big enough to clear some screws that protrude a bit from the outlet, so back to the jigsaw I went.

Much better

Here is one that I had to cut in the middle of a board. I marked the rectangle first.

To use your jigsaw to cut out the rectangle, first use a drill with a large bit to make some holes big enough to slide your jigsaw blade into.

Then cut out each corner separately.


What I neglected to show was how I attached my boards to the wall. I've read that you can glue and nail, but I found nailing to be quite sufficient. I like to know I could remove it if I really want to without the drywall coming with it. I would dry fit 4 or 5 pieces and then nail some in before continuing. This project has given me the practice to be quite confident with my nailing skills.

Thus concludes part one of my beadboard saga. Future installments include covering a wall including baseboard and cap rail, raising your outlets to beadboard depth, and decorative moulding and finishing. Who's excited? :-)

Monday, May 9, 2011

Interweave Knits Summer 2011 picks

My knit dress isn't finished yet. We've had a couple of nights of difficult bedtimes. Anyway, as a diversion, here are my favorites from the Summer Interweave Knits I just received yesterday:

This isn't my favorite issue ever, but there are some intriguing designs, even if I wouldn't want to make them up exactly as designed. Clicking on any photo will take you to its page.

This first one just looks really cool. I like the pleat at the bottom and the stitch pattern around the bust.


I'm not usually crazy about knit skirts or variegated yarns, but the combo here is inspired. I may just put this in the queue.


Finally, I think this is my favorite. I love a cute hat, and this airy pattern looks perfect for Florida.


Of course, I still have a half-finished, short-sleeved, red cabled turtleneck in need of some attention, so I won't be starting anything new yet (all family members will be glad to hear).

Friday, May 6, 2011

McCalls 6032 construction

I started making McCalls 6032 for myself last night, and I thought I'd share the construction of the front gathered feature.

It actually might be a bit difficult to see, but it's pretty cool. You sew a square of reinforcing fabric (I used silk organza) at the end of the darts on the front pieces. Here is the square in the middle of the photo:

Here is the right side view. All you can see is the white stitching of a curve in the middle of the photo.

Then, you slash to the apex of the reinforcing stitches and slash out to the curve in a couple of places. You fold those little slashed bits to the wrong side and topstitch them down. Then, sew up the darts, leaving holes at the points, already finished with the topstitching. Then, you sew the center front seam. (You'll see I decided not to match the print)

Finally, you make a little tube of fabric and slide it through the holes, stitching the tube's raw edges together on the back. The extra fabric just bunches up. It looks cool. I can't wait to work on this dress some more tonight after the kiddos go to bed.

I hope this was follow-able. I didn't really photograph enough steps to make it super clear. Hopefully I'll be showing this dress off this weekend!